


A lot of people keep their favorite photos on computers and want them on their phones too. When switching devices or saving memories, learning how to transfer photos from PC to iPhone becomes essential. Yet, many users find the process confusing because of the different tools and settings. Some rely on iTunes, while others look for faster options like MobileTrans. This guide compares both options so anyone can move photos effortlessly.
Part 1. How to Transfer Photos from PC to iPhone Using iTunes
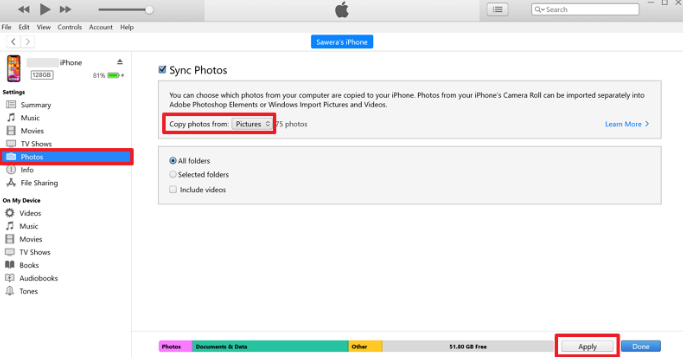
iTunes is Apple’s official way to move files between a computer and an iPhone. It helps users easily sync photos, videos, and music without extra tools. Alongside that, you can organize photo folders and transfer them safely to your iPhone. iTunes also keeps your media library in one place for easy management. So, you need to go through the given steps to understand how to transfer photos from PC to iPhone with a USB cable:
Instruction. When you connect your iPhone to the computer and launch iTunes, click the “Photos” tab and click the “Sync Photos” box. Afterward, click the “Copy Photos From” section to choose your pictures folder and press “Apply.”
Part 2. Limitations of Transferring Photos from PC to iPhone Using iTunes
While this tool works well for syncing photos, it also comes with many limits. These restrictions can make the process slow and less flexible for users. Below, you will find a few main limitations of using this tool for photo transfer:
- Limited Control: You cannot choose specific photos to move, as iTunes syncs entire folders together. This limits flexibility and makes it hard to manage photo transfer for small batches.
- Complex Steps: The synchronization within iTunes is not necessarily easy for users who are new or not very serious. This multi-step method is not easy to repeat consistently and is confusing to many people.
- Slow Speed: Large photo folders can take a long time to sync, delaying the overall transfer process. This makes the method less ideal for users handling big photo collections.
- Software Errors: On numerous occasions, iTunes has crashed or frozen during syncing and interrupted the transfer altogether. Such software problems may render the experience unstable and annoying for beginners.
- Limited Formats: The program only supports certain photo file types for syncing to the iPhone. This means uncommon formats might not transfer unless converted to compatible ones.
Part 3. Transfer Photos from PC to iPhone Using MobileTrans – A Better Option
Apart from that, MobileTrans is highly recommended for users who want an easier and safer transfer method. It supports iPhone 17 and iOS 26 to ensure effortless and reliable performance always. You can transfer photos from a laptop to an iPhone quickly, without complex syncing or long waits. Being easy to use, MobileTrans lets you back up or restore in just a few straightforward clicks.
It even provides selective restore, offering complete control over which data you wish to preserve. Plus, cross-platform compatibility lets you move content between Android and iPhone devices without restrictions. The software never overwrites data, keeping existing pictures safely in place. In addition, this dedicated tool lets you transfer your phone’s data to your computer for backup.
Key Features
- Data Types: Along with images, it also supports 5 different data types, including videos and contacts.
- File Preview: Allows previewing files before backup or restore to select only needed content.
- No Data Loss: Maintains every file’s quality and integrity after migration or restoration is complete.
Guide to Transfer Photos from PC to iPhone Using MobileTrans
This makes it simple for anyone to move pictures between their devices easily. This detailed guide explains how to transfer photos from a laptop to an iPhone without hassle:
Step 1. Open the Phone to PC Tool and Connect the iPhone
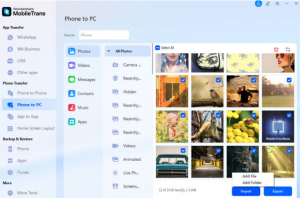
Open the “Phone Transfer” module, navigate to the “Phone to PC” tool, and link your iPhone.
Step 2. Choose Computer Photos to Transfer
Subsequently, click the “Import” button and opt for “Add File” to pick the images that you want to move.
Step 3. Photos Transferred to Your iPhone
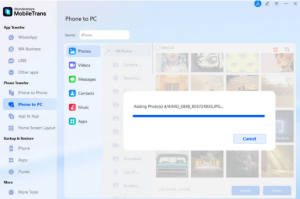
Once chosen, the tool automatically starts importing the selected photos to your connected device.
Part 4. Transfer Photos from PC to iPhone: iTunes vs MobileTrans (Full Comparison)
When deciding to move photos, choosing the right tool is essential. Comparing iTunes and MobileTrans helps users understand the differences in various features and flexibility. This overview makes it easier for anyone to learn how to copy photos from a PC to an iPhone efficiently:
| Feature | iTunes | MobileTrans |
| Ease of Use | Requires multiple steps and technical knowledge | Simple, a few clicks, beginner-friendly |
| Selective Transfer | Cannot select individual photos | Choose specific photos or folders |
| Transfer Speed | Slow for large photo folders | Fast, even with many files |
| Data Overwrite | May replace existing photos | No overwrites, keeps original data safe |
| Cross-Platform | Only supports iPhone | Works with Android and iPhone devices |
| Backup Capability | Limited to iPhone only | Full backup and restore options |
| Data Restoration | Only restores from iTunes backups | Restores from multiple devices or saved backups seamlessly |
Hence, MobileTrans proves to be faster and much easier than iTunes for photo transfer. Its selective import and no-overwrite features give users complete control over their data. Overall, for anyone looking for an effortless solution, MobileTrans is the clear winner for moving photos.
Conclusion
Finally, it can be unclear for many people when it comes to moving photos between a PC and an iPhone. iTunes works but has limitations, such as slow speed and complex steps. Instead, MobileTrans is basic and secure, which enables selective transfers without overwriting the existing files. When learning how to transfer photos from PC to iPhone without losing quality, MobileTrans is the best choice.

